Oplon Secure Access Setup
Accessing the Dashboard
Open a browser and navigate to:
https://x.x.x.x:4444Where x.x.x.x is any IP address assigned to the system (unless you changed the default 0.0.0.0 during oplonsetup).

- Login:
root(or the account set during setup) - Password: the password you chose during setup

License Installation - Unified license (Version >= 11.3.0)
Starting with version 11.3.0 a Unified license is available: a single license file that contains and activates all purchased Oplon products for your instance. If your appliance runs version >= 11.3.0, install the Unified license and you do not need to load module licenses individually.
Steps:
- Open the top-left menu and click the gear icon to access Settings.
- Select Install License.
- Upload the
.xmlfile of the Unified license. - Perform Save and Re‑Init to apply changes.


License Installation (Version < 11.3.0)
If you are running a release older than 11.3.0, install individual licenses:
- the Catalog license (Node license)
- and the ADC/module licenses required (e.g. Platform, Standard HA, Enterprise HA)
Ensure that on releases < 11.3.0 you load the Catalog license first, then each module license as needed. After installing licenses perform Save and Re‑Init.
Install Catalog License
- Open the top-left menu and click the gear icon to access Settings.
- Select Install License.
- Upload the Catalog
.xmllicense file.
Install Platform License (or other ADC)
- Go to Modules > ADC & GLB.
- Select the target ADC (e.g. Platform) using the arrow next to its name.
- Click Actions > Install License.
- Upload the ADC
.xmllicense file.


Quick Setup (Version >= 11.0.0)
Starting from version 11.0.0 of Oplon, you can skip the entire “Manual Setup” process. Just follow the steps below, which automatically include the required rewrite rule configuration.
- Go to ADC Settings > Listener
- Locate the SecureAccess listener (already preconfigured)
- Enable the listener by clicking the blue icon:

- Set Enable to
trueand configure the desired listening IP address - Click Save, then Reinit to apply changes

Quick Setup also includes the basic MFA setup.
You will still need to manually import the certificates and customize the 2faGeneric rewrite rule, as explained in:
Manual Setup (All Versions)
⚠️ If you’re using Oplon version 11.0.0 or later, it’s recommended to follow the Quick Setup, which automates most of the configuration.
This section is intended for those who:
- are using an older version of Oplon
- or prefer to perform a fully customized and manually controlled setup
Manual Setup walks you through the essential configuration steps — like rewrite rules and listeners — which are automatically applied in the Quick Setup.
This is the recommended method for advanced environments, in-depth testing, or scenarios where default settings must be avoided.
Copy of the Rewrite Header Rules
- Rewrite Header Rules Research
we check the Templates view and search for the string
securein search.
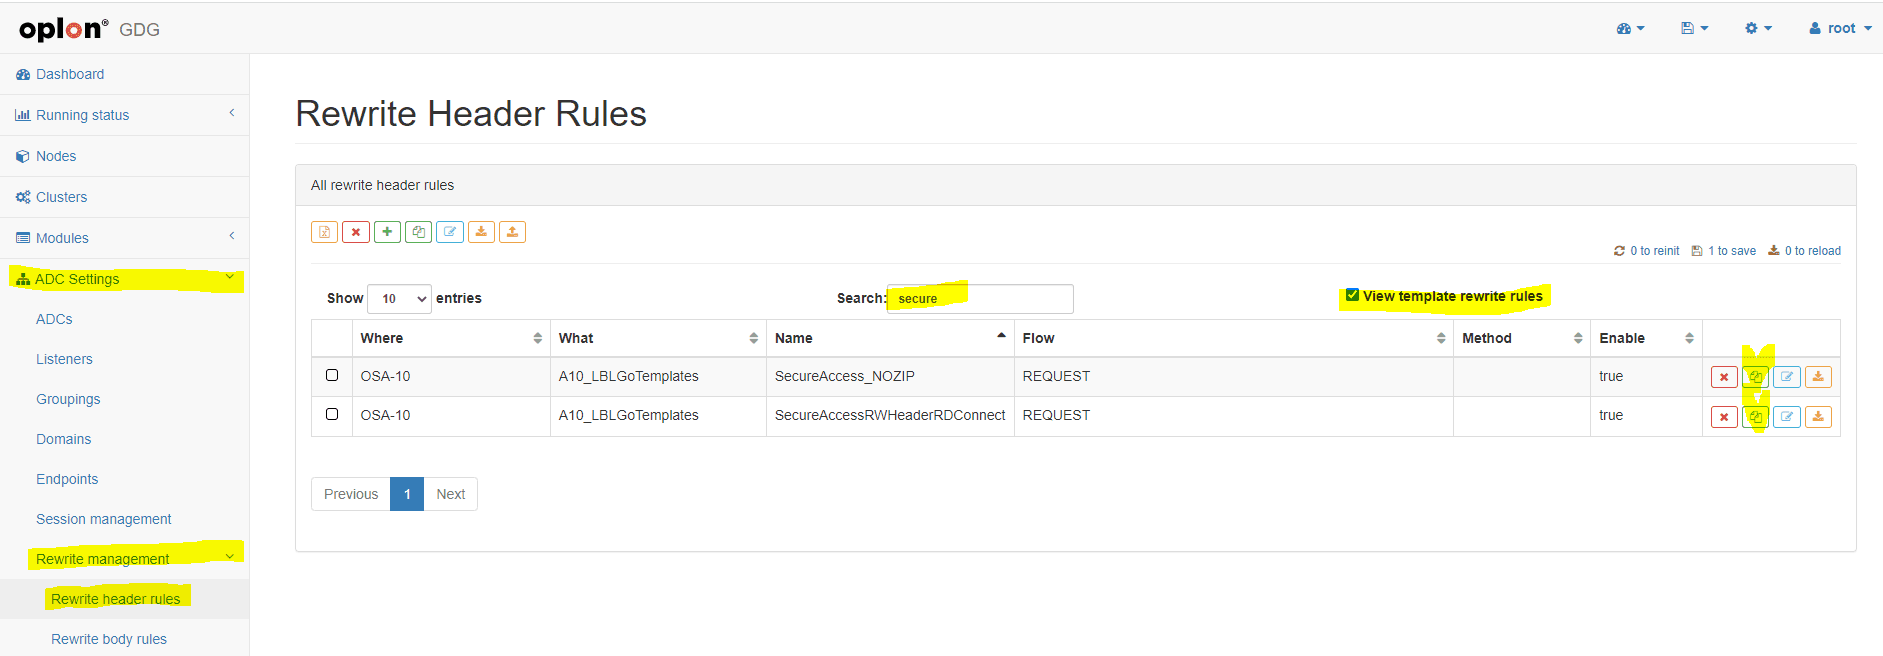
- Rewrite Header Rules Copy
we copy the Templates in our
A10_LBLGoPlatformPlatform
Summary Video Rewrite Header Rules Research and Copy
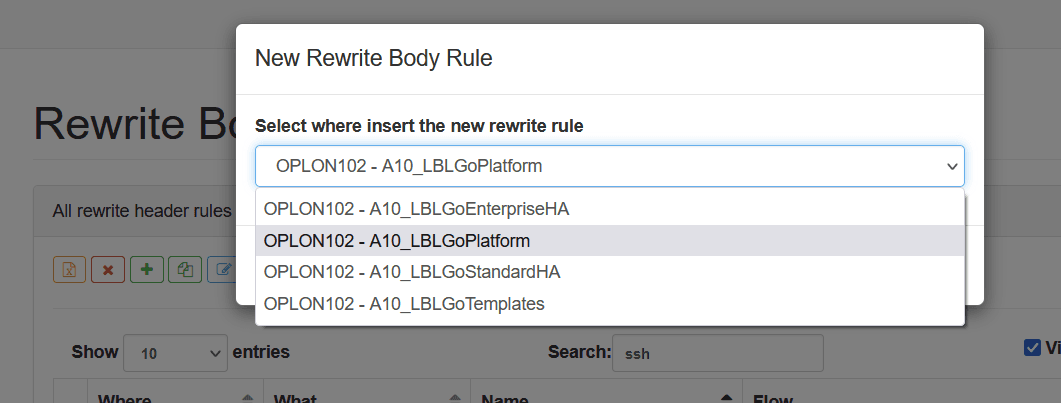
Copy of the Rewrite Body Rules
- Rewrite Body Rules Research
we check the Templates view and search in search for the string
secure
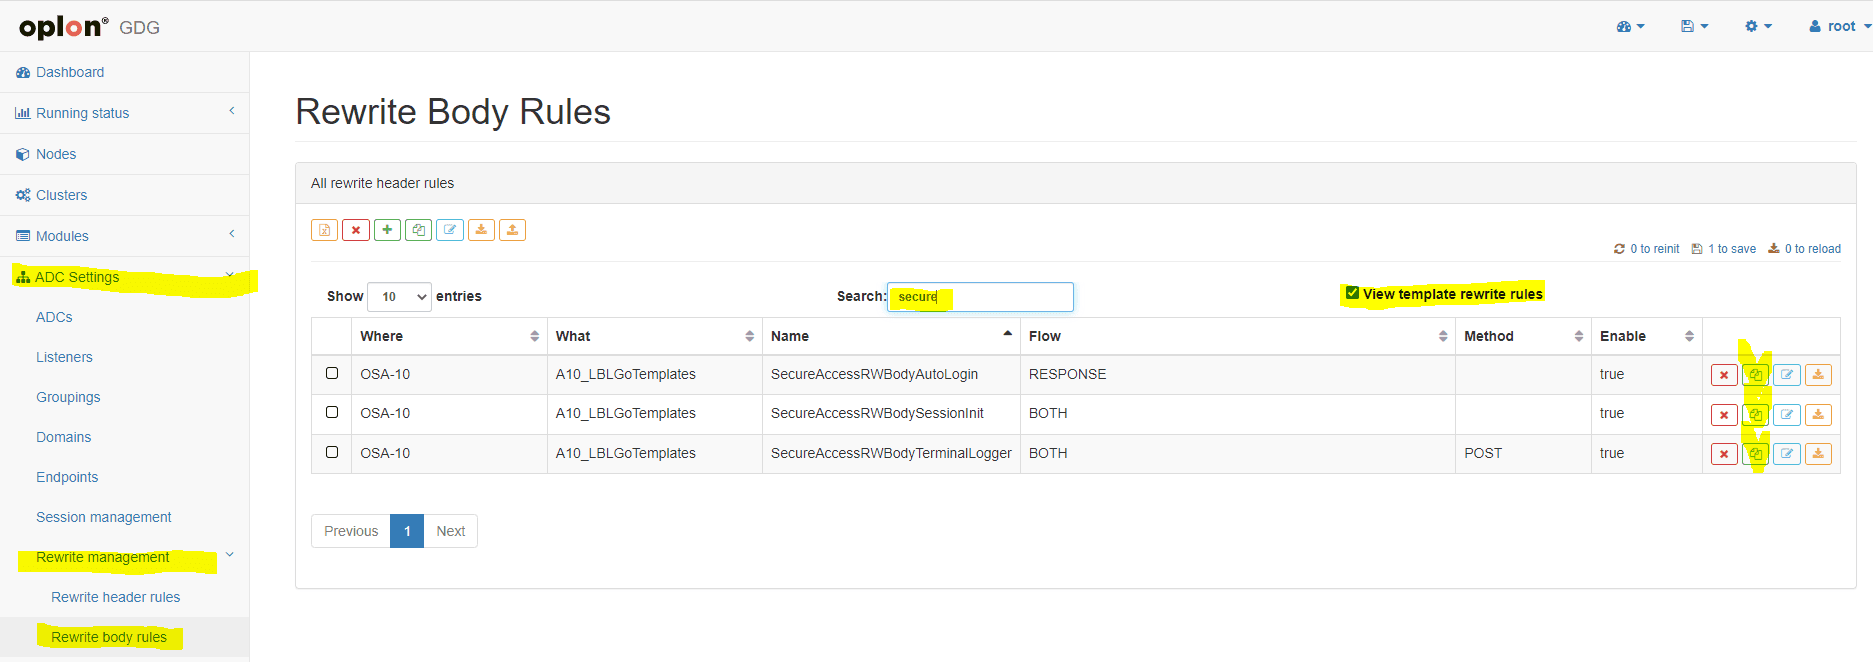
- Rewrite Body Rules Copy
we copy the Templates in our platform
A10_LBLGoPlatform
Summary Video Rewrite Body Rules Research and Copy
Copy of the Endpoints Grouping
Accessing the section Grouping from ADC Settings we copy the group from templates
- Endpoints Grouping Research
we check the Templates view and search for the string
securein search
- Endpoints Grouping Copy
we copy the templates in our platform
A10_LBLGoPlatform

Summary Video Endpoints Grouping Research and Copy

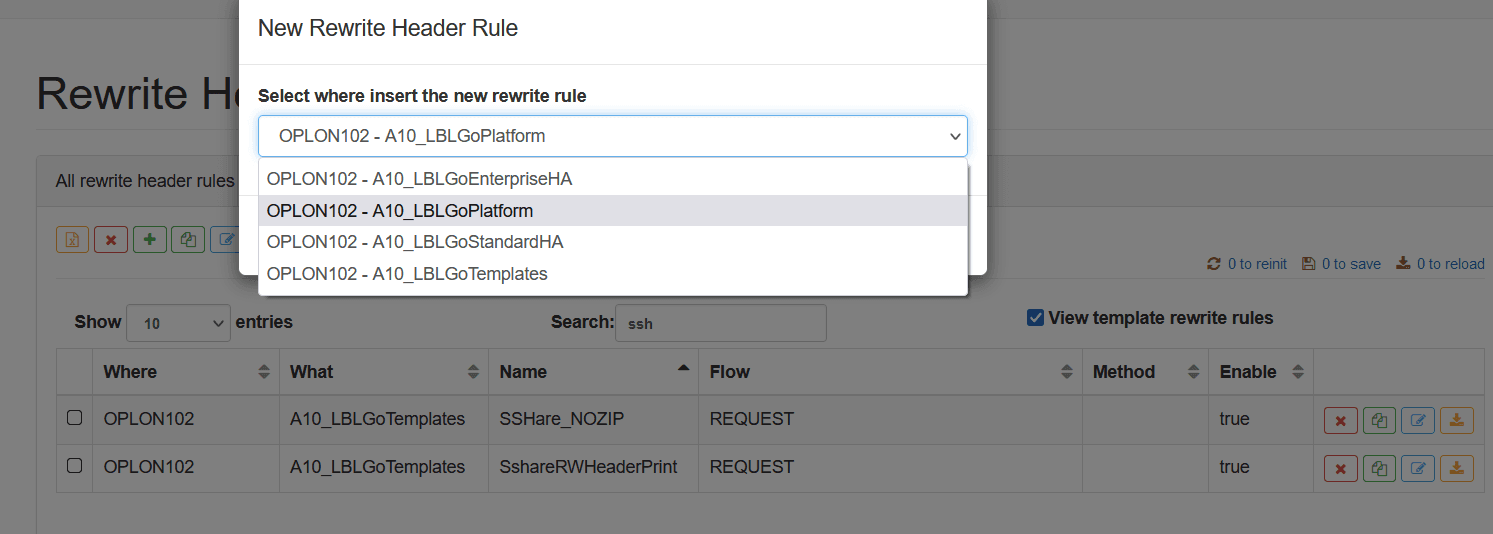
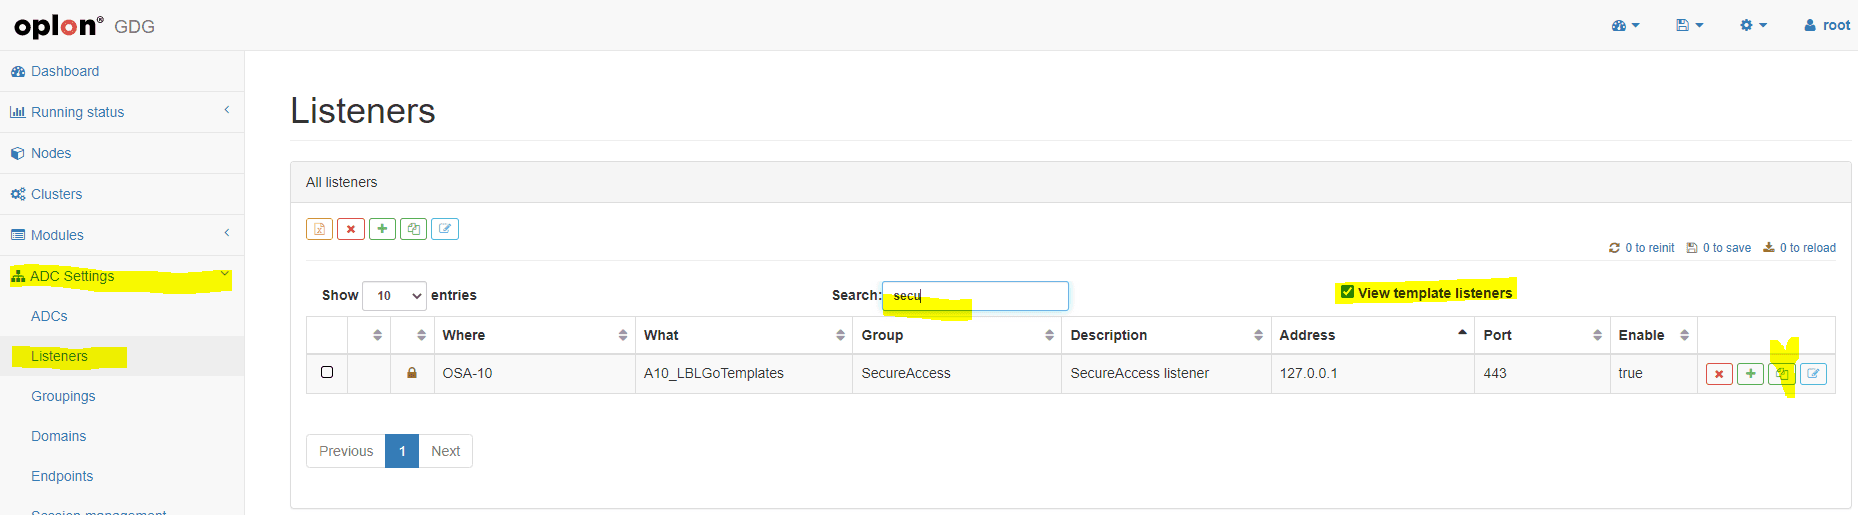
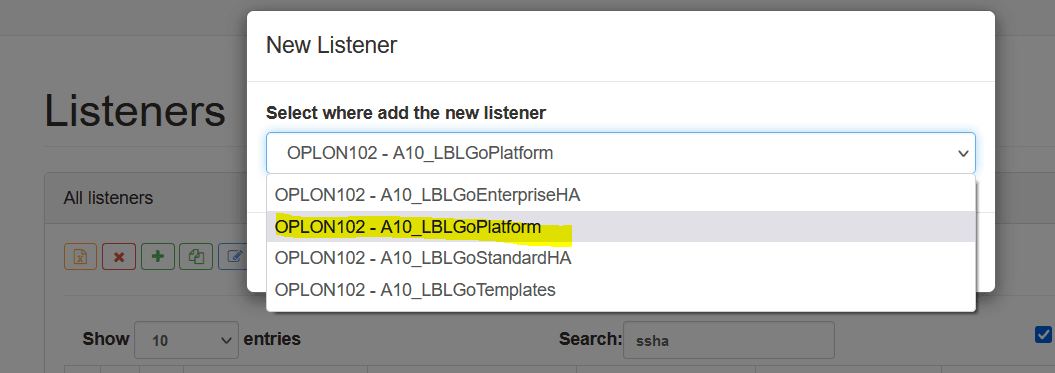
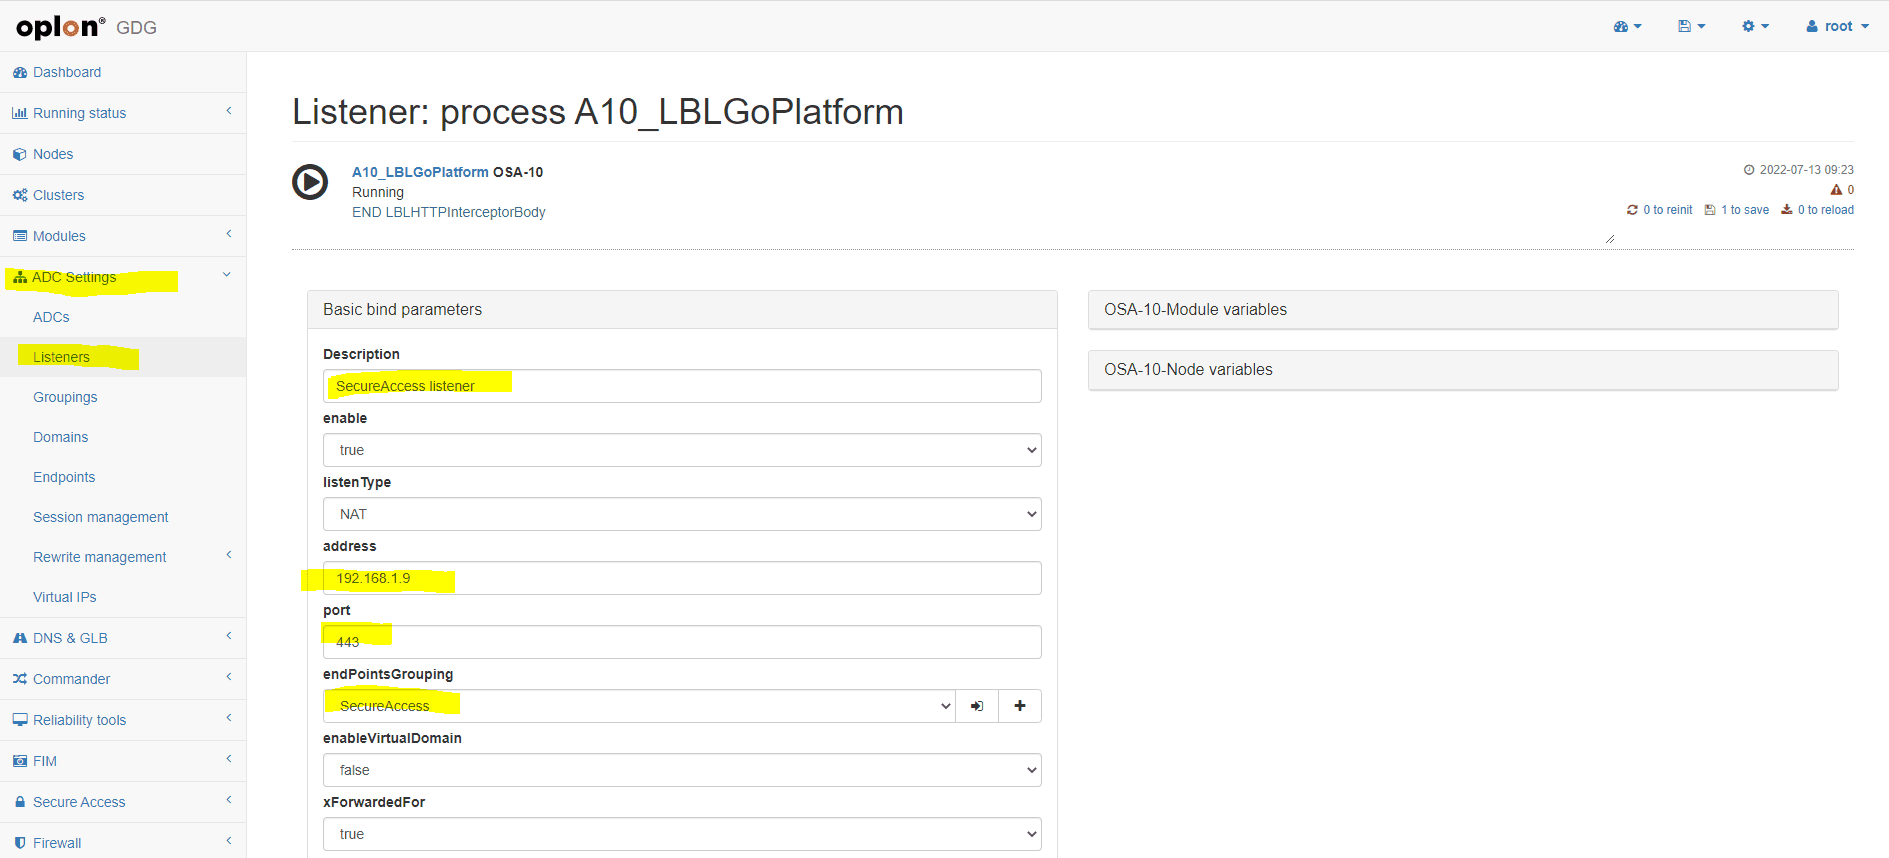
Copy Of The Listener
at this point we can put a listener in Listener with associated OSA group we will proceed, as in the previous examples, to a copy from the templates inside our platform
- Listeners Research:
we check the Templates view and search for the string
securein search
- Listeners Copy:
we copy the templates in our platform
A10_LBLGoPlatform
- Listener Customization: according to our needs we proceed to give our listener a name, an ip address where it will be connected and an a port where it will be listening. To this we assign the right Endpoint Grouping previously copied.
- endPointsGrouping:
SecureAccess
Summary Video Listener Research and Copy
Automatic Module Startup
If you’re installing Oplon Secure Access for the first time, it’s essential to configure the automatic startup of the following modules:
- R00_DesktopBridge
- R00_SshBridge
- R10_RemoteAccessGateway
- A10_LBLGoPlatform (or alternative ADCs)
In this example, we’ll show how to configure the R10_RemoteAccessGateway module. The process is the same for the other modules.
How to Enable Automatic Startup for the R10_RemoteAccessGateway Module
-
Go to Modules > All Modules and use the search bar to find R10_*. Once you find the module, click the blue button:

-
On the module page, open the General Start Parameters menu and set the Module Start field to automatic.

Saving the Changes
After applying all the necessary changes, save them and proceed with a reinit to apply:

Verifying Proper Operation
To verify that everything is working correctly, open a browser and enter the following address:
https://<ip_address>:443Depending on your configuration (with or without MFA), you’ll see one of the following:
- The MFA login screen, with a redirect to super.oplon.cloud.
- The Secure Access screen, which may display various errors due to missing MFA configuration. You can configure MFA from the appropriate section if needed: MFA Setup.